


What is composition in animation? This fundamental question dives into the core of creating visually appealing and effective animations.
Composition dictates how visual elements are arranged and balanced within a frame. It’s not just about good aesthetics; it’s about guiding the viewer’s eye, enhancing storytelling, and creating mood.
Understanding composition involves mastering techniques like the rule of thirds, perspective in animation, and the effective use of negative space.
These principles contribute to the overall success of a scene, whether you’re working with 2D animation, 3D animation, or motion graphics.
In this article, you’ll learn about the most essential aspects of composition in animation.
We’ll explore the underlying principles, delve into advanced techniques, and provide practical applications.
By the end, you’ll have a comprehensive understanding of how to apply composition to elevate your animation projects.
What is composition in animation?
Composition in animation is the arrangement of visual elements within a frame to create balance, focus, and storytelling impact. It involves positioning characters, objects, and backgrounds to guide the viewer’s eye, enhance mood, and emphasize key actions, ensuring clarity and aesthetic appeal in every scene.
Compositing in Animation
Understanding Compositing
The Basics of Combining Visual Elements
Compositing in animation is the process of combining visual elements from separate sources into single images. This involves layering, blending, and adjusting to create a cohesive scene.
Whether working with 2D animation, 3D animation, or motion graphics, compositing is essential to achieving visual harmony.
This integration is achieved through various techniques that allow elements like characters, backgrounds, and effects to coexist seamlessly in a single frame.
Historical Evolution: From Pre-Digital to Digital Compositing
The evolution of compositing has come a long way from early hand-drawn techniques to today’s digital methods.
Pre-digital compositing involved physical film cuts and paste, creating complex scenes manually. With the advent of digital compositing, this process has transformed.
Software like Adobe After Effects and Nuke allows for intricate and precise manipulation of visual elements. The shift from pre-digital to digital has significantly streamlined workflows, offering more control and efficiency.
The Role of Compositing in Animation Pipelines
Its Placement in the 3D Animation Workflow
In the 3D animation workflow, compositing typically occurs after the rendering phase. Once the 3D models and scenes are rendered, different passes — such as background, foreground, and effects layers — are brought together in the compositing stage.
This is where all the visual elements are finalized and integrated to achieve the desired look.
Interaction with Pre-Production and Production Outputs
Compositing in animation doesn’t stand alone. It interacts with both pre-production and production outputs.
During pre-production, the storyboard and layout design provide a blueprint for compositors, outlining how elements should be layered and integrated.
In production, rendered frames, effects, and character animations are delivered to compositors to be pieced together. This interaction ensures that the final visual output aligns with the original vision and storyboard.
Types of Compositing Techniques
Layer-Based Compositing

Layer-based compositing is a method where different visual elements are stacked in layers. Each layer can be adjusted independently for effects such as color correction and blending.
Software like Adobe After Effects excels in layer-based compositing, making it a go-to for many animators. This technique allows for significant flexibility and control over individual elements within a scene.
Node-Based Compositing

Node-based compositing, used in software like Nuke, involves creating a network of nodes where each node represents a process or effect applied to the visual elements.
This method offers a non-linear approach, enabling complex and dynamic adjustments. Node-based systems are often preferred for intricate and large-scale animation projects due to their scalability and versatility.
Specialized Approaches: Blue/Green Screen Replacement and CGI Integration
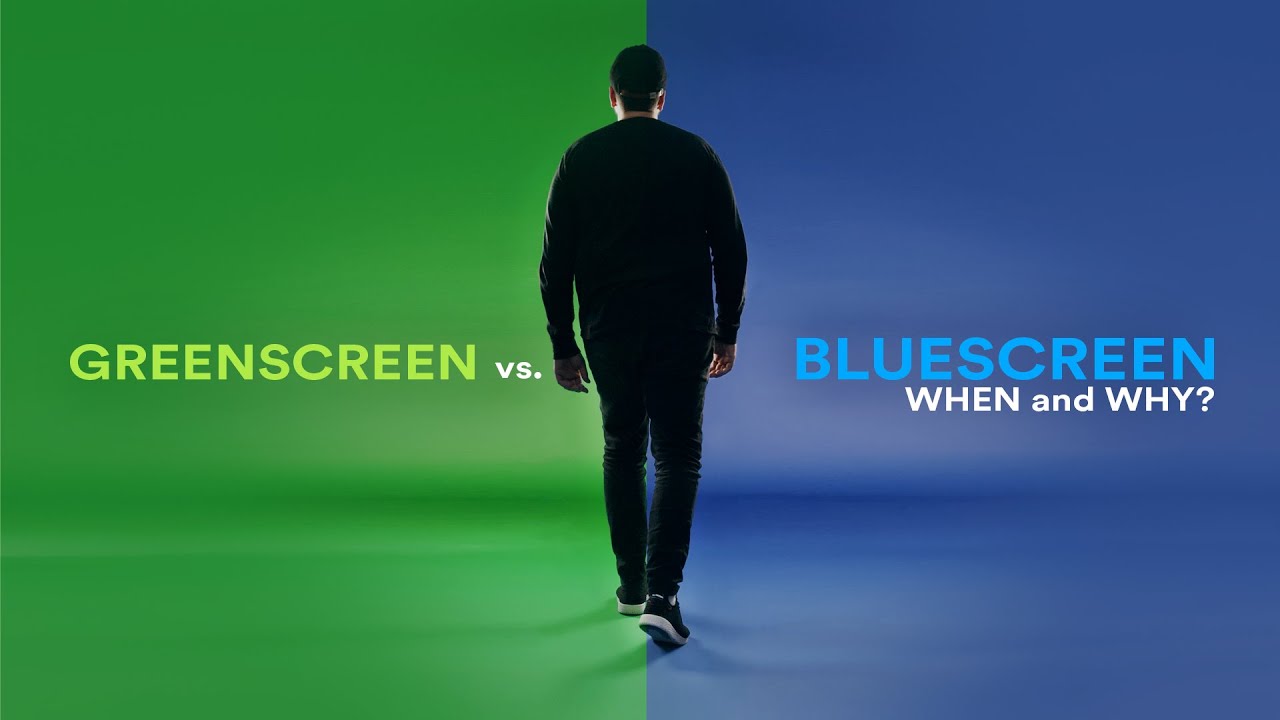
These specialized approaches include techniques like blue/green screen replacement and CGI integration.
Blue/green screens allow for the isolation of foreground elements, making background replacement straightforward.
CGI integration involves combining live-action footage with computer-generated imagery to create seamless interactions between the physical and digital worlds.
Benefits of Compositing in Animation Production
Time and Cost Efficiency
Compositing introduces significant time and cost efficiencies in animation production.
By enabling the separation and independent manipulation of visual elements, changes can be made without re-rendering entire scenes. This saves time and reduces production costs, particularly in complex animations.
Flexibility in Making Adjustments
Compositing offers immense flexibility in making adjustments. Visual elements can be tweaked with ease, whether it’s color correction, adding effects, or changing backgrounds. This adaptability is essential for achieving the best possible visual outcome without redoing entire sections.
Enhanced Control Over Visual Details
With compositing, there’s enhanced control over the finer visual details. Depth of field, lighting, and shadows can all be adjusted in post-production to enhance the visual storytelling. This level of control allows the final product to have a polished and professional look.
Key Techniques in Compositing
Render Passes
Explanation and Benefits of Using Render Passes
Render passes break down a scene into individual components. This granular approach offers a significant advantage: it allows for isolated adjustments.
Need to tweak the lighting on your character? No problem. Want to add more shadows to the background? Easy. This flexibility is invaluable when refining visual details without re-rendering the entire scene.
Types of Passes: Background, Foreground, and Effects Layers
Render passes come in various forms:
- Background passes handle the scenery behind characters and objects.
- Foreground passes focus on elements in front, mainly characters or key objects.
- Effects layers incorporate additional visual details like smoke, fire, or magical effects.
Leveraging these passes enhances the control over the final visuals, ensuring each layer contributes perfectly to the overall image.
Effects Integration
Color Correction and Lighting Adjustments

Color correction and lighting adjustments can dramatically change the scene’s mood.
Adjusting the color balance makes elements fit harmoniously, avoiding jarring visuals. Lighting changes can bring depth and emotion to a scene.
For instance, tweaking highlights and shadows can make a flat image appear more dynamic and realistic.
Adding 2D Effects and Particles
Integrating 2D effects like smoke, rain, or magical particles can elevate the scene. These additions need to blend seamlessly with the existing visuals.
Software like After Effects excels in adding particles and other 2D elements, making the animation richer and more engaging. Ensuring the right color, movement, and timing of these effects is crucial for effective blending.
Adding 3D Models in Post-Production
Direct Integration of 3D Models in Effects Software
Adding 3D models during post-production simplifies the animation process.
By importing 3D elements directly into compositing software, animators adjust positioning, lighting, and interactions more efficiently.
This integration supports the seamless incorporation of 3D models into live or animated scenes, ensuring cohesive interaction between all elements.
Advantages of Layer-Based Workflows in 3D Editing

Layer-based workflows offer significant advantages in 3D editing.
By organizing elements into layers, adjustments can be made without affecting the entire scene.
Need to change the position of a 3D model? Modify the corresponding layer without disrupting other components. This method streamlines the editing process and enhances precision, making it easier to achieve the desired visual outcome.
Composition in Animation
Fundamentals of Composition
The Rule of Thirds

The rule of thirds divides the frame into nine equal parts using two equally-spaced horizontal lines and two equally-spaced vertical lines.
This technique guides the placement of critical elements along these lines or at their intersections. It helps create balance and directs viewers’ attention naturally throughout the frame.
Balance in Framing
Balance in framing ensures that visual weight is evenly distributed across the scene. This can be symmetrical, where elements are mirrored, or asymmetrical, where different elements balance each other out.
This balance is crucial for avoiding a cluttered or lopsided look, making sure each part of the frame holds appropriate visual interest.
Use of Contrast
Contrast is the practice of emphasizing differences in color, shape, size, or texture to highlight specific aspects of the composition.
It can create a focal point, draw attention to key parts of the frame, and deliver a more engaging visual experience. High contrast can create drama, while low contrast can suggest harmony or subtlety.
Framing and Shot Selection
Long and Wide Shots for Scene Establishment

Long and wide shots are instrumental in setting the scene. They provide context, showing the environment where the action takes place.
These shots can establish the location, mood, and scale, creating a sense of place before zooming in on the action.
Medium Shots for Character Focus
Medium shots serve to focus on characters, capturing them from the waist up. They strike a balance between the subject and background, allowing for character detail while still providing some context.
These shots are great for interactions and ensuring viewers connect with the characters within their setting.
Close-Up and Extreme Close-Up for Emotional Engagement
Close-up shots frame the subject tightly, often focusing on a character’s face. Extreme close-ups go further, highlighting specific facial features or objects.
These shots are paramount for conveying emotion, showing minute details that express feelings and connect viewers intimately with the character’s experience.
Negative Space Utilization
Enhancing Focus on Key Elements
Negative space, the empty area around the subject, is used to enhance focus. By providing breathing room, it directs viewers’ attention to the key elements without distraction.
This technique simplifies the composition, making it clear and deliberate where viewers should look.
Creating Mood and Atmosphere
Utilizing negative space can also create mood and atmosphere. Vast empty spaces can evoke feelings of loneliness, isolation, or focus. In contrast, just a bit of negative space can make the subject pop against a busy environment, adding tension or emphasis.
Adjusting negative space helps in sculpting the emotional tone and storytelling of each frame.
Advanced Composition Techniques
Consistency in Tone and Style
Establishing and Maintaining Narrative Tone
Establishing a narrative tone starts with a clear vision. Every scene, every frame must align with this tone. Are we going for a dark, moody vibe or something light and whimsical? Consistency is key. Early on, set rules for color palettes, lighting schemes, and framing methods.
Once these are in place, maintain them rigorously. Inconsistencies can jolt viewers out of the experience. Transitioning from a brightly lit scene to a dark and foreboding one requires subtlety and intention. Stay true to the narrative, and the audience stays engaged.
Ensuring Visual Coherence Across Scenes
Visual coherence means that every element, from the smallest prop to the largest background, should feel like part of a single world. This involves meticulous planning. Maps, storyboards, and layout designs all contribute.
When designing characters, consider how they’ll interact with their environment. Use consistent textures, lighting, and shading to tie everything together. Visual coherence isn’t just about aesthetic; it’s about immersion.
Lens and Perspective Choices
Wide-Angle vs. Long Lenses: Impacts on Scene Dynamics
Lens choices have a dramatic effect on the viewer’s perception. Wide-angle lenses capture more of the scene, making spaces seem larger and actions more dynamic. They distort edges slightly, adding intensity to close-up action sequences.
Long lenses, on the other hand, compress space, making background elements feel closer to the foreground. This technique can heighten tension, making scenes feel claustrophobic or intimate. The choice of lens directly impacts the scene’s emotional weight.
Framing Techniques to Influence Viewer Perception
How we frame a shot can say more than the action within it. Low-angle shots can make characters appear powerful; high-angle shots can make them seem vulnerable. Changing the angle changes the story.
Consider the rule of thirds for basic framing but don’t shy away from breaking it when the story calls for it. Symmetry can be mesmerizing, or unsettling, depending on the context. Use framing to guide the viewer’s eye, enhance focus, and build narrative tension.
Environmental Storytelling
Using Light and Shadows to Evoke Emotion
Lighting design is central to storytelling. Soft, diffused light can give a sense of calm and serenity, while sharp, contrasting shadows add drama and tension. By manipulating light and shadow, you can evoke specific emotions without words.
Hard light reveals harsh truths; soft light hides flaws. Strategically placed light sources can highlight key elements or create areas of mystery. The interplay of light and shadow enhances not just the visual aesthetic but the emotional resonance of a scene.
Arranging Elements for Narrative Depth
Every object in a scene has a role in telling the story. Background elements, foreground details, and everything in between should complement each other. This takes planning. Sketch out layouts, consider the placement of props, and think about how characters move through the space.
Use depth to add layers to the narrative. Elements in the fore and background should interact meaningfully with the middle ground. This technique creates a multi-dimensional space that feels lived-in and real.
Integrating Compositing and Composition for Cohesive Animation
The Interdependence of Compositing and Composition
Enhancing Storytelling through Synergy
Compositing and composition aren’t just neighbors—they’re collaborators. When combined effectively, they elevate storytelling.
Compositing assembles the visual elements: render passes, 3D models, special effects. Composition arranges those elements within the frame, balancing and guiding the viewer’s eye.
Together, these techniques create a narrative flow that’s visually compelling. A well-composited scene might have intricate layers of light and shadow; a well-composed scene will place those layers to tell a richer story.
This synergy is not just a luxury—it’s essential for animation that hits home.
Managing Layers, Lighting, and Framing Together
Managing these elements requires a meticulous approach. Layers, whether in Adobe After Effects or another compositing software, must be handled with an eye for detail.
Each layer serves a purpose: the foreground, background, visual effects, and elements in between. Properly organizing these layers impacts how effectively they can be integrated.
Lighting plays a pivotal role in bringing these layers to life. It’s not just about brightness or shadow—it’s about mood, depth, and focus. Proper lighting can make a scene feel cohesive, even if it’s composed of multiple disparate elements.
Framing is the final touch. It’s about ensuring all these elements come together in harmony within the shot. Whether it’s a wide-angle establishing shot or a tight close-up, the framing sets the stage for how the viewer will experience the scene.
Case Studies
Examples of Successful Integration in Popular Animations

Think of “Toy Story” from Pixar. The synergy between compositing and composition is brilliant. In scenes where Woody and Buzz interact, every layer—from the background to the smallest particle—serves the story.
Lighting is impeccable, capturing the playful and sometimes intense world of Andy’s room. The framing enhances the emotional arcs of the characters, making their relationship feel authentic.

Another example is “How to Train Your Dragon” by DreamWorks. Its use of compositing creates a lush and immersive environment.
Layered clouds, dynamic lighting, and fluid animations are strategically placed to pull viewers into the world of dragons and Vikings.
Techniques and Insights from Industry Experts
Experts from Walt Disney Animation Studios and other leading houses emphasize the importance of a collaborative workflow. When compositors and layout artists work in tandem from the start, the results are seamless.
Some tips:
- Early Integration: Start discussions about compositing and composition early in the project. It saves time and ensures both elements are considered from the outset.
- Consistent Communication: Regular feedback between teams helps maintain visual coherence.
- Adaptability: Be ready to iterate. Small changes in composition might require tweaks in compositing and vice versa.
Industry tools like VEGAS Pro and Blender facilitate this collaboration, offering functionalities that enhance both compositing and composition efforts within unified workflows.
Practical Applications and Tools
Essential Software for Compositing
Overview of Leading Tools (e.g., VEGAS Pro, VEGAS Effects)

When it comes to compositing, the right software can make a world of difference. VEGAS Pro and VEGAS Effects are top contenders.
With their robust suite of tools, these programs offer everything needed for intricate compositing tasks. They’re user-friendly yet powerful, perfect for both beginners and seasoned pros.
Of course, there’s also Adobe After Effects, a staple in the industry. Its flexibility and wide range of plugins make it a go-to for complex compositing work.

Nuke by Foundry is another heavyweight, especially favored for its node-based compositing, allowing for more detailed and precise visual effects.
Features Supporting Advanced Compositing
Advanced compositing is all about control and precision. These tools shine in this aspect:
- Layer-Based Compositing: Essential for organizing and managing multiple visual elements. Software like After Effects excels here, offering intuitive layer management.
- Node-Based Compositing: Tools like Nuke use nodes to represent different processes, making it easier to track and manipulate complex projects.
- Real-Time Previews: Immediate feedback is crucial. VEGAS Pro and After Effects provide real-time previews that help in making quick adjustments.
- Keying and Masking: Removing backgrounds or isolating elements is made simpler with advanced keying and masking features. Blue/green screen replacement becomes almost effortless.
- 3D Integration: Incorporating 3D models directly into your compositions can elevate your project. These programs support seamless 3D integration, blending CGI with live-action footage.
Tools for Effective Composition
Software with Framing and Shot Design Capabilities

Having the right tools to design your shots is critical. Blender is not just for 3D modeling; its animation and framing capabilities are quite impressive. With it, you can map out every scene, ensuring each shot aligns with your vision.
Autodesk Maya offers powerful functions for shot design, with comprehensive tools for both 2D and 3D framing. It’s especially useful in pre-visualization, letting you storyboard and plan your shots meticulously.
Use of Templates and Grids for Consistency
Templates and grids are lifesavers for maintaining consistency. Programs like After Effects and Toon Boom Harmony offer built-in grids and customizable templates. Using the rule of thirds grid ensures your compositions are balanced.
VEGAS Pro also provides useful shot templates, making it easier to keep framing consistent across your project. By leveraging these tools, you can ensure every frame is aligned, balanced, and visually appealing, sticking closely to principles of what is composition in animation.
FAQ on Composition In Animation
Why is the rule of thirds important?
The rule of thirds divides the frame into nine equal parts using two horizontal and two vertical lines.
Placing key elements along these lines or their intersections creates more balanced and engaging compositions, making the scene more dynamic and aesthetically pleasing.
How does framing affect the perception of a scene?
Framing determines what the audience sees and how they see it. Different framing techniques can evoke different emotions and direct attention to specific elements.
For example, close-ups focus on character emotions, while wide shots establish the environment and context.
What role does negative space play?
Negative space is the empty area around the main subjects in a frame. It helps to focus attention on key elements, reduces clutter, and can create a sense of scale and depth.
It also plays a crucial role in setting the mood and atmosphere of a scene.
How do lighting and shadows impact composition?
Lighting and shadows add depth and dimension to scenes. Proper lighting can highlight important elements and create mood, while shadows can introduce drama and focus.
Adjusting these aspects enhances visual storytelling and makes scenes more realistic and engaging.
What are the benefits of using render passes?
Render passes separate different elements of a scene into individual layers—background, foreground, effects, etc.
This allows for greater control during post-production adjustments, making it easier to fine-tune individual elements without affecting the entire scene.
How does lens choice influence a shot?
Lens choice affects the viewer’s perception of a scene. Wide-angle lenses capture more of the environment and can make spaces feel larger, whereas long lenses compress space and bring background elements closer. This choice impacts scene dynamics and emotional tone.
Why is consistency in tone and style crucial?
Consistency in tone and style ensures that all elements of a scene or sequence match visually and thematically.
This coherence helps maintain the audience’s immersion and supports the narrative flow, making the overall animation more believable and engaging.
What tools are essential for effective composition?
Software like Adobe After Effects, Blender, and Toon Boom Harmony provides tools for framing, shot design, and layer management.
These programs help create balanced compositions by offering features like rule of thirds grids, customizable templates, and advanced overlay options.
Can you explain environmental storytelling?
Environmental storytelling uses visual elements within the scene to convey background information or set the mood.
This can include the setting, props, and lighting. Arranging these elements thoughtfully adds narrative depth and enhances the viewer’s understanding and emotional connection.
Conclusion
Understanding what is composition in animation is crucial for creating visually appealing and effective storytelling. Composition involves elements like the rule of thirds, balance, lighting, and framing. It goes beyond aesthetics, guiding the viewer’s eye and enhancing the narrative.
Using tools like Adobe After Effects, Blender, and Toon Boom Harmony, animators can meticulously plan and execute their scenes. Effective composition ensures that each frame is not just visually stunning but narratively engaging.
By integrating compositing and composition seamlessly, animators achieve a harmonious blend of elements. This synergy brings depth and life to animation, making it more immersive and impactful. From environmental storytelling to dynamic lens choices, every detail matters.
Mastering these techniques and principles elevates your animation projects, creating a cohesive and professional final product. The importance of composition in animation cannot be overstated—it’s the backbone of visual storytelling.


